Back in March I paid a visit to a Chicago-area motorcycle institution. Each Sunday morning, bikers of all sorts descend on the Full Moon Diner for the weekly motorcycle gathering and ride.
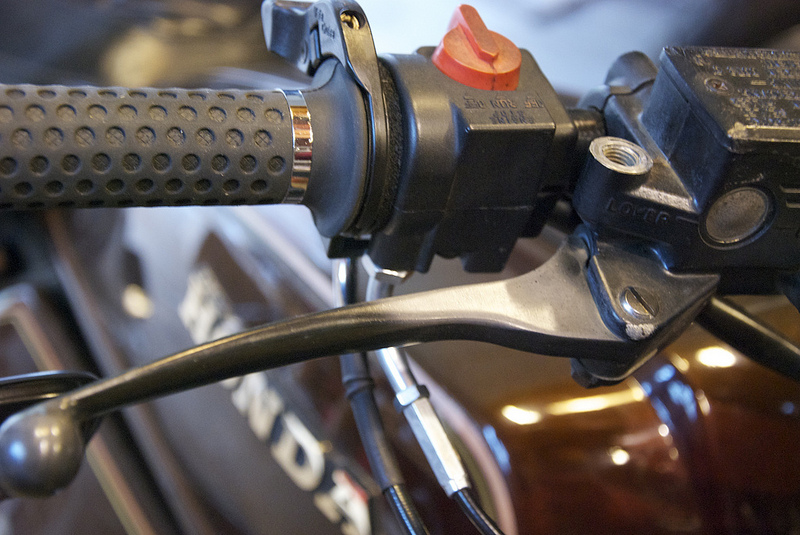
I’d ridden up there on the GL with Steve, the President of the Chicago MINI Club. There were all manner of bikes both old and new, foreign and domestic. The GL is such an odd duck that it got lots of attention from the gathered regulars. One guy pointed out that one of my front brake lines was too long. He was right. It was too long and a bit unsightly because I’d replaced the handlebars with lower, shorter ones. I told him I hadn’t bought a shorter line yet because I was going to overhaul the whole system, unlink the brakes, and replace the front master cylinder with something off a modern sport bike. This seemed to confuse him. He paused for a moment before looking at me with a furrowed brow and saying, “You can’t do that.” His sincerity was striking. He said it like it was against the law. What I think he meant was “There’s no bolt-on kit for that.” He’d be right, but I was more entertained by what he’d said than what he likely meant. I just grinned at him.
“Sure I can.”
Since even before I bought it, I’d planned to unlink the front and rear brakes on my 1983 Honda GL1100. You see, in ’83 Honda made several key changes to the GL that make it a desirable model year to own. They made the gears taller, they introduced the terrific 11-spoke alloy wheels, and they linked one of the front disk brakes with the rear disk. Well, two out of three ain’t bad.
I hate the linked brakes. They’re terrible. They ruin the brake feel and rob the rider of both control and braking power. All the extra plumbing makes the system prone to take on air more quickly and need bleeding more often. Bottom line though, the bike simply doesn’t stop as well as it ought to. I suppose most people don’t mind it, but on my GL, the linked system simply had to go. I had a plan, but this was definitely uncharted waters. I’d be pushing out beyond simple repair and maintenance and doing some custom engineering. What’s more, this wouldn’t be an aesthetic change. These are the brakes. There is no room for error with brakes. Not being able to stop is bad, kids.
The GL’s factory linking works like this: Rather than the right hand control actuating both of the GL’s front disks, its master cylinder only controls the left front disk. The front right disk and rear brake are both actuated through the right foot pedal, which is normally just the rear brake on most motorcycles. This is accomplished by a steel “hard line” that runs from the rear master cylinder to a hydraulic splitter valve. The splitter takes the hydraulic pressure created by the foot pedal and splits it 50/50 between the rear brake and the right front brake. So unlinking the brakes involves changes to both hydraulic circuits, if you will. The link from front-to-rear must be broken, and a new link must be created between the two front brakes, controlled by the right hand lever. The rear brake is then left to be run by the right foot pedal as God intended.
Before I could start this process, however, I had to solve one big problem. That is, I had to figure out how to isolate the rear brake. Hooking up both front brakes to the same master cylinder would be easy, and in fact, there are even three or four “correct” ways to do it. The front brake’s systems all use universal fittings and are more-or-less unchanged on bikes today. The rear, on the other hand, uses Honda-specific, rigid steel brake lines to first split the master cylinder’s output, and then carry that output forward to the front of the bike. Removing these hard lines involves taking half the motorcycle apart. Literally. But that’s only half the trouble. Since the rear master cylinder is designed for these rigid brake lines, it doesn’t use standard banjo fittings. So unlike the front brakes, which I could re-plumb as easily as I’d put together legos, it was looking like the rear brake would require getting a custom cable made that would plug into Honda’s one-off rear master cylinder. That, or I’d have to replace the rear master cylinder with something modern and fabricate a mounting bracket and pedal hook-up.
I explored lots of options. I thought about plugging the hard line at the front of the bike, but that would make the vestigial rigid line impossible to bleed, rendering the rear brake useless. It wasn’t until I looked at the exploded view of the system on “the fiche” that the solution finally came to me. Rather than trying to plug that forward, rigid line, I could simply disconnect it at the splitter and plug the open passage with a bolt and crush washer. The only tricky thing was that I couldn’t tell which line went where by just looking at the bike. Thankfully the exploded view showed me which port to plug. By plugging the correct branch, I could simply disconnect that rigid line, flush it out with brake cleaner, and leave it in the frame until such time as I do a frame-up rebuild of the motorcycle. Hard to figure out, but easy to do.
Once I understood what to do, it was time to take the plunge. This project really excited me, but it intimidating me at the same time. Would it work? Would I go through all the trouble and expense of new fittings and a new front master cylinder only to have the bike not stop any better? There was only one way to find out.
I began by emptying both master cylinders and all three lines through the bleed valves on the brake calipers. I then disconnected the hard line in the frame from the stainless steel flexible line running down to the front right caliper. I removed the front master cylinder from the bike completely. In its place, I had a brand new 5/8″ Nissen master cylinder intended for a Suzuki GSX-R superbike. The new piston size would supposedly give me better brake feel, and the adjustable handle positions would allow me to fine-tune where in the handle’s throw the brakes start to engage. This single master cylinder would run both front brakes, which means I needed to split its output somehow.
Instead of a fork-mounted splitter, I took a page from the book of a fellow GL customizer and used a double banjo bolt in the right caliper to share pressure to the left — essentially using the caliper itself as a splitter. A main brake line would come down from the master cylinder, then a secondary line loops over the fender to tie in the left caliper. Using pre-fabricated stainless steel lines from Dime City Cycles, assembling the new system was a snap. I bled first the right caliper and then the left. This I had to do by hand because I don’t have access to a power bleeder at the moment. Nonetheless, I was able to get very solid feel in the new front master cylinder in just a few minutes. I gave the new brake setup a quick test by gently rolling the bike forward and then squeezing the lever. Both forks dove in unison as the wheel stopped instantly. This was a very good sign.
All that remained now was to disconnect the forward leg of the linked system and plug that hole with a bolt and washer. Per usual with the GL, this would prove more difficult than expected. There’s always something on a wrench project that won’t cooperate, and it’s usually something small and stupid. A single bolt that won’t turn loose, or won’t start threading, or jumps loose and gets lost. In this case, the fitting I needed to get loose wouldn’t budge. This system had been assembled at the factory and probably hadn’t been touched since. The 10mm bolt head started to round off as I got more and more aggressive with an end wrench.
Quitting while I was ahead, I had just one option remaining, and it was a path of no return. The only way to get that bolt off was to cut off the rigid line so that I could put a 6-point socket over the head of the bolt. There would be no undoing that. If this didn’t work, I’d have no rear brake until I could either engineer a new line all the way to the rear master cylinder, or take half the bike apart and replace that rigid line — taking the bike all the way back to stock.
Deep breath.
My hacksaw made quick work of the small steel line. A touch of liquid wrench and a bit of leverage soon had the bolt successfully out of the splitter. I took the bolt to my local hardware store to match the size and threading, and once that new bolt was cut to length, it was just a matter of screwing it in. A pair of copper crush washers would quite literally seal the deal. Not five minutes later, I had the rear brake freshly bled and nothing was leaking. Pedal feel was better too. Not surprising now that three feet of line had been removed from the system.

That was that. Everything worked. I felt like I’d gotten away with something. Nothing had broken. The bolt was stubborn, but otherwise my method had actually worked! Nothing left but to ride the beast now. Would it stop better? Would all this effort make a difference?
I fired the bike up and cautiously headed out onto our small street. I tested the brakes separately. First the front, then the rear, and the difference was amazing. The GL finally felt like a motorcycle. The front brake had a terrific depth of feel it’d never had before. As I’d hoped, the two front brakes working in concert gave me access to probably another 20-30% of braking power I just couldn’t get to before. The front brakes alone were now able to provide nearly all of the stopping power the linked system had provided previously. The rear brake felt great as well. With less line to push fluid through and one fewer calipers to deal with, the foot pedal could now properly squeeze the rear rotor. The GL will always require both front and rear brakes to stop aggressively, but finally having access to the stock brake components’ full capabilities would allow me to ride the GL much more aggressively.
I progressively pushed the brakes harder and harder, stopping myself from higher and higher speeds around the neighborhood before returning to my garage to check for leaks. Everything was dry and tight. With preliminary testing a success, I headed for the freeway. This was the point of no return. The price for failure is much higher at 70 mph. Had I done everything correctly? There was nothing for it but to trust myself. This is the faith I’ve always had to have as a recreational mechanic. If something goes wrong, I’d have no one to blame but myself. But like every time I finish one of these projects, I had to simply put the worry out of my mind and trust myself.
As expected, and as hoped, nothing failed. In fact, the new brake setup performed far beyond my expectations. Finally having full control of the motorcycle made the GL come alive. I could finally ride the thing the way its power and handling deserved. I could barrel up to an on-ramp, get hard on the brakes and tuck into the cloverleaf. I could feather in just a touch of rear brake to calm the bike down on a hill. Best of all, I could finally balance the bike’s braking power front-to-rear. Why anyone would want the linked system is beyond me. This is what this motorcycle should have felt like from the factory.
It was a wrench victory of the first order. I couldn’t have been more proud of the outcome. I’d done my research, taken my measurements and done the installation successfully. But more than that, this was a victory of purpose. I hadn’t simply fixed something on my motorcycle. I’d re-engineered the braking system. I’d significantly modified one of the primary safety and control systems not because it was broken, but because I didn’t like it. I wanted it to perform better. I think about that guy at the Full Moon Diner and how in his mind, if there wasn’t a kit for it, such things are impossible — not for mere mortals to undertake. In the end, this turned out to be a really straightforward job. For less than $200 in parts, I’d transformed my grumpy old motorcycle into something much more road worthy. It has me thinking, what impossible thing should I do next?
![]()
Great story. The best part I think is how you finally figured out how to un-do it. What that tells me is that it was a similar “hack” when the Honda engineers figured out an “easy” way to link them in the first place. The rigid lines, no doubt to try and offset the additional length, still introduced sponginess. In the end you un-packed their hack and restored a solid feel to the brakes.
You’re right on, I think. All the rigid lines attach via bolt-on clips and what not. The actual frame of the GL, as I understand it, didn’t change from 1975-1983. In ’84 they went to the GL1200 and finally altered the frame geometry, even though it was mostly the same engine.
That interchangeability will likely come into play before this project is over. I greatly prefer the shape of the body panels off the mid-to-late ’70s GL1000s. Those mixed with my side panels should make for some really sleek lines.
Mechanically, all the GL needs at this point is to have its anti-dive mechanisms rebuilt in the front forks. Then it’ll be time for all the aesthetic customization to begin. Can’t wait.
Nathaniel i just read the whole post as im rebuilding an 83 for a friend and the linked brakes will not bleed
So ive been looking for ways to get rid of the system and i was thinking of using an 82 master cylinder that i have . But after reading this i guess i wont be using it .
And has mother Honda no longer make the splitter then its time to figure out new ways of making the gl work
The upgrade is well worth the $125 or so I spent on the Nissen mater cylinder. (eBay) In fact, I was riding the bike today and had to do a very hard stop. Very grateful for the upgrade. Matching the thread on the splitter to plug the forward line was pretty easy. It’s a metric extra fine thread, but they had it at my local hardware store. I just cut it to length and added the copper crush washer. Bleeding the unlinked system was very quick, even with the dual front disks. Good luck!
Where talking about this on NGW.com and we all think this is the only way to go . So im biting the bullet and doing this ive just put the fairing on so ,ow i guess it comes off . And if this feels as good i might do my 83 the same way
Too bad about the fairing. I just can’t imagine how any home mechanics put up with them. My Goldwing Standard is bad enough in terms of taking twelve things apart to access whatever needs repair.
It’s worth it though. Of all the upgrades and repairs I’ve done to this bike, unlinking the brakes was the most profound. In my opinion, the machine just isn’t as safe as it should be without this upgrade.
I’m not done either. I’ll likely upgrade to floating rotors and perhaps even go up to a larger diameter and upgrade to modern calipers. The anti-dive mechanism has actually done me a favor there, as it gives me lots of options for machining custom bracket adaptors for a variety of calipers.
Do you happen to remember what length brake lines you used from Dime City?
I am in the process of doing this on my 83.
Thanks
I ordered 27″ and 35″ hoses respectively. The 27″ is more or less EXACTLY the right length to loop over the wheel. It’s a little tight even. It holds itself tightly against the fender and there wasn’t actually room to loop it through the normal fender brake line holders. It’ll be fine for my application in the long run because I’m actually going to convert over to a much lower profile front fender in the long run. But it wouldn’t suffer for a little more room if you wanted run the lines through the actual holders.
I just did this to my 83 GL1100 – love it! I used a Nissin 651B for the master, black vinyl wrapped stainless lines and ATE Super Blue fluid. I also used a double banjo bolt to link the front calipers.
The bolt you need to plug the rear splitter is an M10 with 1.00 thread pitch. You’ll need an angle grinder to cut it short enough.
I have size 13 feet and sometimes have trouble locating the GL’s tiny brake pedal quickly. One more reason to shift the majority of the braking power to the hand lever.
Great! It makes such a big difference, doesn’t it? I appreciate not just the greater braking power, but the significant increase in brake feel. I have such a better sense of what the bike is up to now. In the future, I’m doing an even more revolutionary brake upgrade. I’m swapping out the front forks for GL1000 forks, then doing custom brackets to fit a pair of 4-piston calipers from a donor BMW onto gigantic 320 mm floating rotors. Can’t wait to see what kind of difference it makes. Glad you had success!
Great write up!
This is a project I plan on completing on my 83 Interstate. Thanks for the information and persistence!
Jerry
Thanks Jerry. If you like that, you’ll love what I’m doing next. I’m converting the front end of my GL to a GL1000 set of front forks with cartridge emulators then doing a custom big brake setup using 320mm rotors and radial calipers from a CBR1000RR.
Keep an eye out for the launch ofSalzmoto.com in the coming weeks. That’s where I’ll be moving all my moto blogging going forward.